Growing oyster mushrooms
 ©Janet Allen
 Oyster mushroom kit
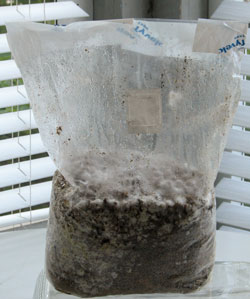
Another way to grow mushrooms is by buying a kit. This is a kit to grow elm oyster mushrooms we got from The Imaginary Farmer.
The bag is a mixture of mushroom spawn, coffee grounds, water, hydrogen peroxide, and sawdust. The bag has a special filter on it.
This photo was taken four days after the kit was started.
 ©Janet Allen
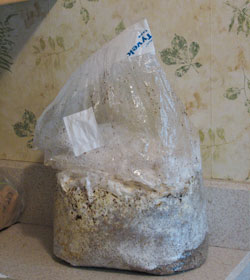
 Here's the progress after a few weeks
If you saw this sitting somewhere—let alone on a kitchen countertop—you'd probably think it was ready for the trash!
So far, it's been sitting here under a brown paper grocery bag, since it's supposed to be in normal room temperature, but in the dark. I took the paper bag off just to take the photo.
 ©Janet Allen
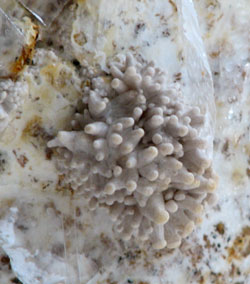
 They're starting to fruit
After yellow liquid began to form, we sliced an "x" into one end of the plastic.
A few days later, they started to grow!
 ©Janet Allen
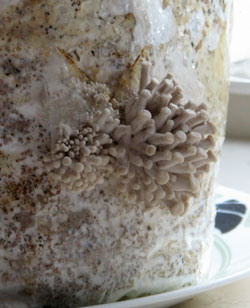
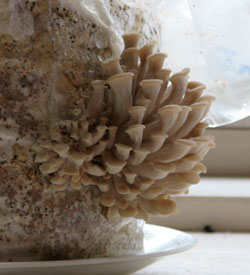
 Day 2
Day 2 (after they started developing).
We spray the developing mushrooms four times a day.
 ©Janet Allen
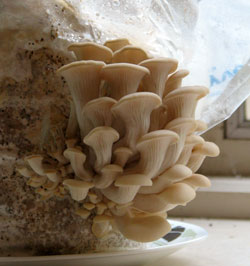
 Day 3
Day 3
 ©Janet Allen
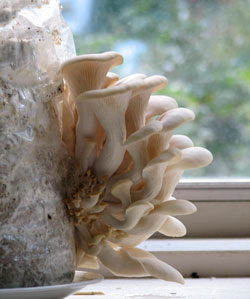
 Day 4
Day 4. They're growing amazingly quickly!
 ©Janet Allen
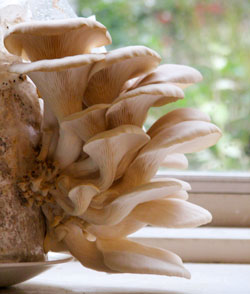
 Day 5
Day 5. They're still growing and starting to change shape.
 ©Janet Allen
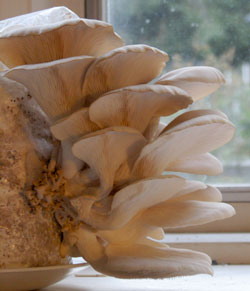
 Day 6
Day 6
 ©Janet Allen
 Day 7
Day 7, and I think we're ready to harvest. We've bought a loaf of our favorite Wegmans country French bread that we buy a couple of times a year for mushroom sandwiches and tomato sandwiches.
 ©Janet Allen
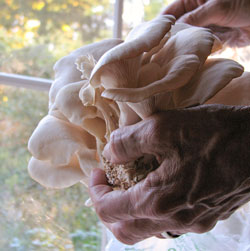
 Our first harvest
We harvested them on day 7, twisting the bunch from the bag. They weighed about 0.8 pounds. This means we only need about three more similar harvests from the bag to recoup our $15 cost, then the rest is profit.
New "clumps" of mushrooms are supposed to now grow from this hole, and then we'll cut another "x" in the opposite side of the bag.
Even if we approach breaking even, though, it's a big benefit to have truly fresh, organic mushrooms available with so little work!
